Workbook Views
There are various types of view options in Excel, which helps you to view a workbook in many formats.
You can choose to view any workbook in Normal view, Page Layout view, or Page Break view. These views can be useful for various tasks, mainly if you're planning to print the spreadsheet.
Excel offers three workbooks views, Normal, Page Layout and Page Break Preview.
Normal
At any time, you can switch back to Normal view.
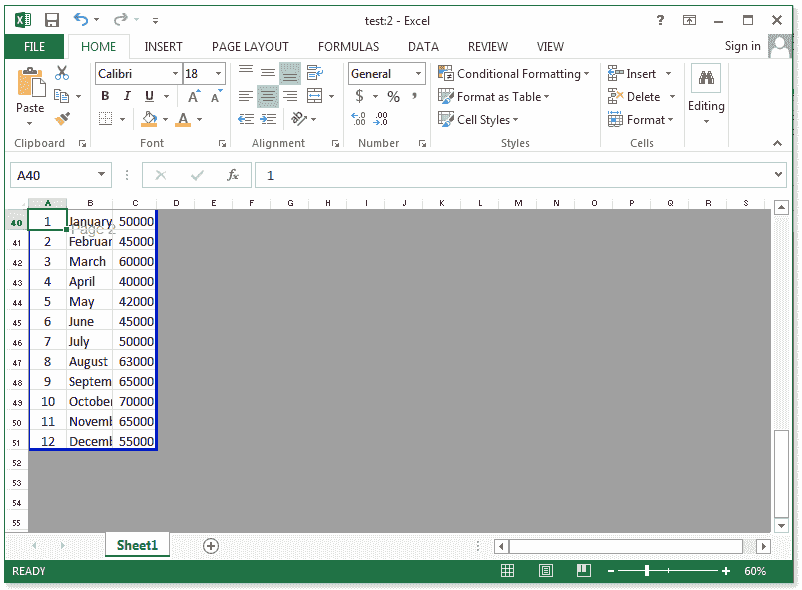
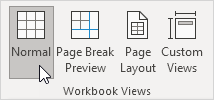
1. On the View tab, in the Workbook Views group, click Normal.
Result:

Note: if you switch to another view and return to Normal view, Excel displays page breaks. Close and reopen the Excel file to hide these page breaks. To always hide page breaks for this worksheet, click File, Options, Advanced, scroll down to Display options for this worksheet and uncheck Show page breaks.
Page Break Preview
Page Break Preview gives you a nice overview of where pages break when you print the document. Use this view to easily click and drag page breaks.
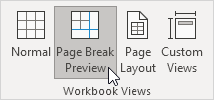
1. On the View tab, in the Workbook Views group, click Page Break Preview.
Result:

Note: click and drag the page breaks to fit all the information on one page. Be careful, Excel doesn't warn you when your printout becomes unreadable. By default, Excel prints down, then over. In other words, it prints all the rows for the first set of columns. Next, it prints all the rows for the next set of columns, etc. (take a look at the page numbers in the picture above to get the idea). To switch to Print over, then down, click File, Print, Page Setup, on the Sheet tab, under Page order, click Over, then down.
Page Layout
Use Page Layout view to see where pages begin and end, and to add headers and footers.
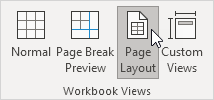
1. On the View tab, in the Workbook Views group, click Page Layout.
Result:
