

Wrap text in a cell
Microsoft Excel can wrap text so it appears on multiple lines in a cell. You can format the cell so the text wraps automatically, or enter a manual line break.
Wrap text in Excel if you want to display long text on multiple lines in a single cell. Wrap text automatically or enter a manual line break.
Wrap Text Automatically
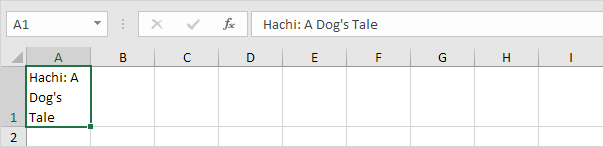
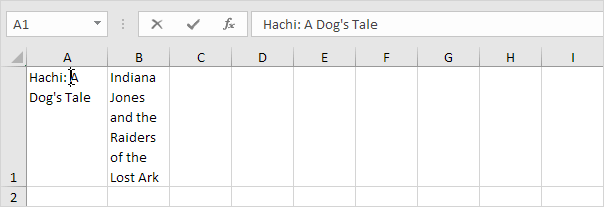
1. For example, take a look at the long text string in cell A1 below. Cell B1 is empty.

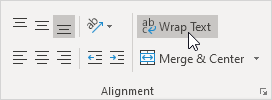
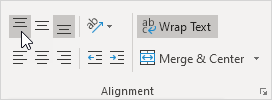
2. On the Home tab, in the Alignment group, click Wrap Text.
Result:
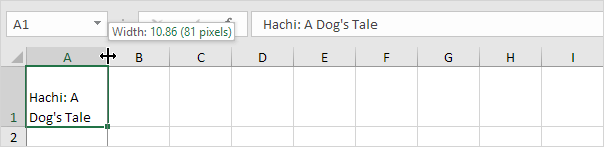
3. Click on the right border of the column A header and drag the separator to increase the column width.
4. Double click the bottom border of the row 1 header to automatically adjust the row height.

Note: if you manually set a row height (by clicking on the bottom border of a row header and dragging the separator), Excel does not change the row height when you click the Wrap Text button. Simply double click the bottom border of a row header to fix this.
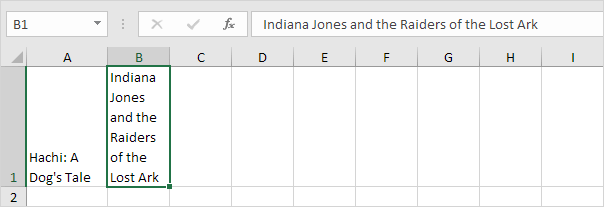
5. Enter an extra-long text string in cell B1 and wrap the text in this cell.
Note: by default, Excel aligns text to the bottom (see cell A1).
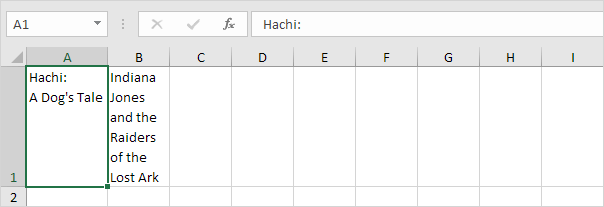
6. Select cell A1.
7. On the Home tab, in the Alignment group, click Top Align.
Result:

Manual Line Break
To insert a manual line break, execute the following steps.
1. For example, double click cell A1.
2. Place your cursor at the location where you want the line to break.
3. Press Alt + Enter.
Result:
Note: to remove a manual line break, double click a cell, place your cursor at the beginning of the line and press Backspace.