
Data validation in Excel helps you control what users can enter into a cell, ensuring data stays accurate, clean, and consistent. Instead of fixing mistakes later, you define rules upfront so Excel blocks invalid input automatically.
You can find Data Validation under the Data tab. In this guide, we’ll walk through how it works by exploring its three main sections:
- Settings
- Input Message
- Error Alert
We’ll also build a real-world example step by step.
Table of Contents
1. Opening the Data Validation Tool

Follow these steps:
- Select the cell where you want to apply validation
- Go to the Data tab in the Ribbon
- Click Data Validation in the Data Tools group
The Data Validation dialog box will open.
Inside this dialog box, you’ll see three tabs, each with a specific purpose:
- Settings – Defines what type of data is allowed
- Input Message – Displays instructions when the cell is selected
- Error Alert – Shows a warning if invalid data is entered
⚠️ Important note:
Data validation is not foolproof. If users copy data from cells without validation and paste it into validated cells, the rules may be overridden. Always test pasted values in shared files.
2. Using the Settings Tab
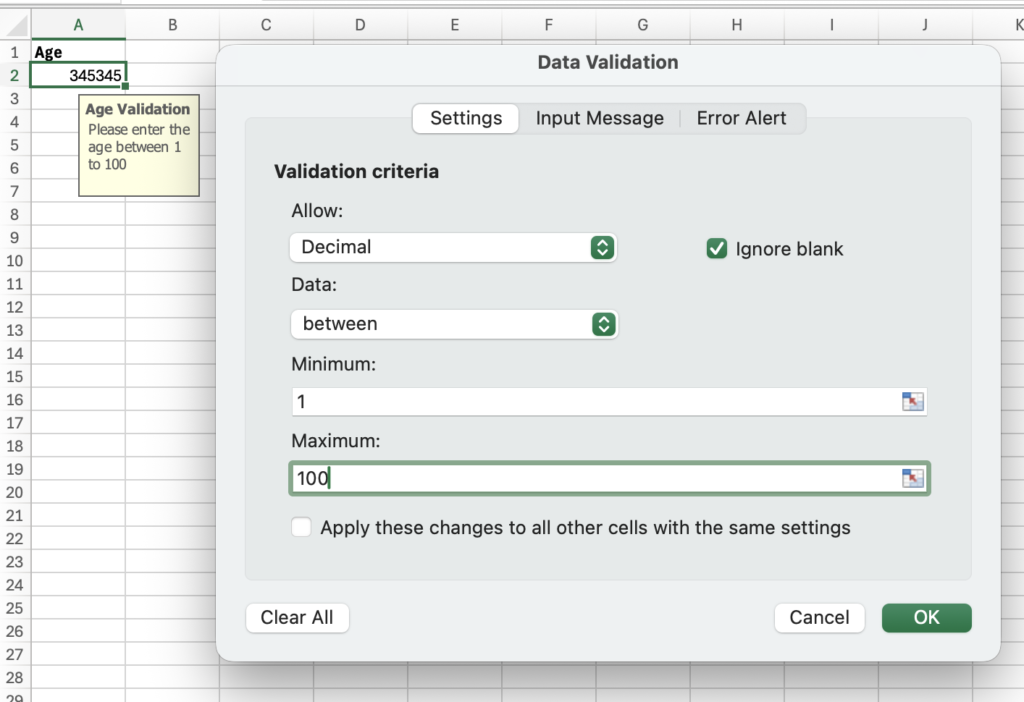
The Settings tab is where you define the actual validation rule.
Here, Excel allows you to:
- Restrict numbers, text length, dates, or lists
- Set minimum and maximum limits
- Create custom rules using formulas
This tab gives you full control over what users are allowed to enter.
3. Adding an Input Message (Optional but Helpful)
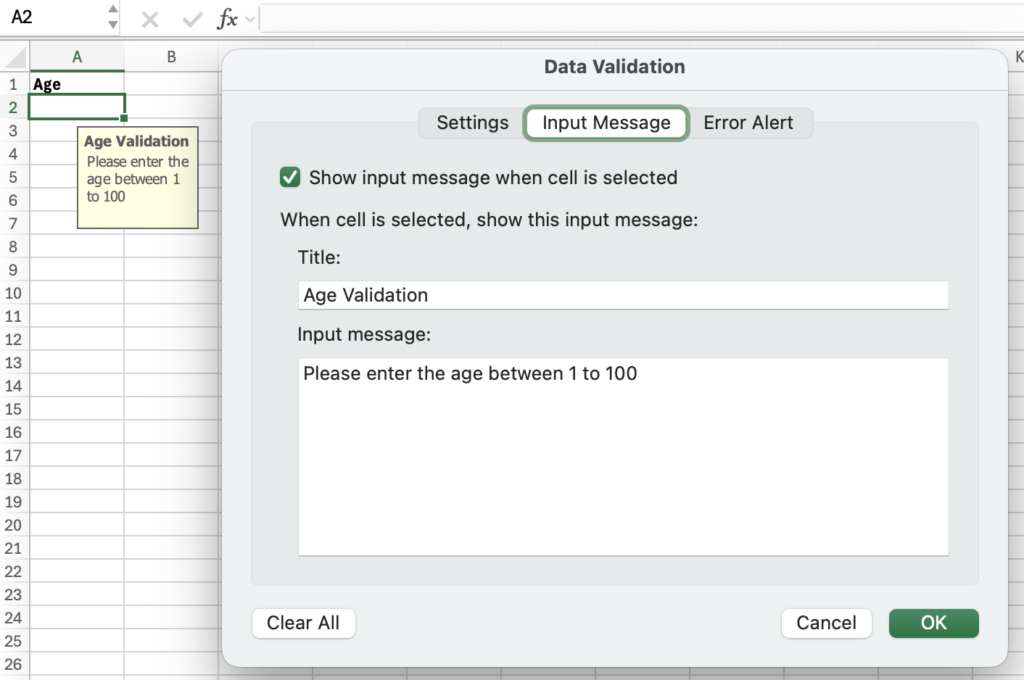
The Input Message tab allows you to guide users before they type anything.
When configured, Excel displays a message as soon as the user selects the cell, explaining what kind of data is allowed.
Steps to Add an Input Message
- Open Data Validation
- Go to the Input Message tab
- Check Show input message when cell is selected
- Enter a Title and Message
- Click OK
Now, whenever the cell is selected, users see clear instructions.
4. Configuring an Error Alert
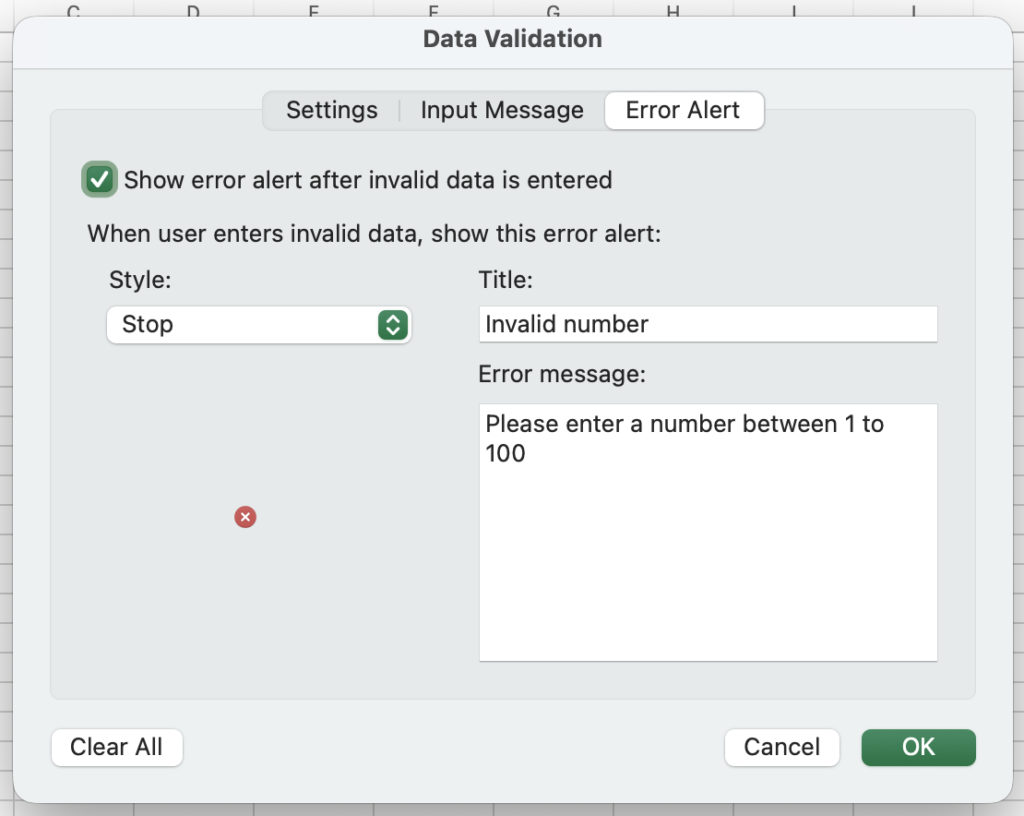
The Error Alert tab controls what happens when someone enters invalid data.
Excel provides three error styles:
- Stop – Completely blocks invalid input
- Warning – Allows users to override
- Information – Shows a message but accepts the value
How to Set a Custom Error Alert
- Open the Error Alert tab
- Enable Show error alert after invalid data is entered
- Choose an error style
- Enter a title and message
- Click OK
This ensures users know exactly why their input was rejected.
5. Creating a Drop-Down List with Data Validation
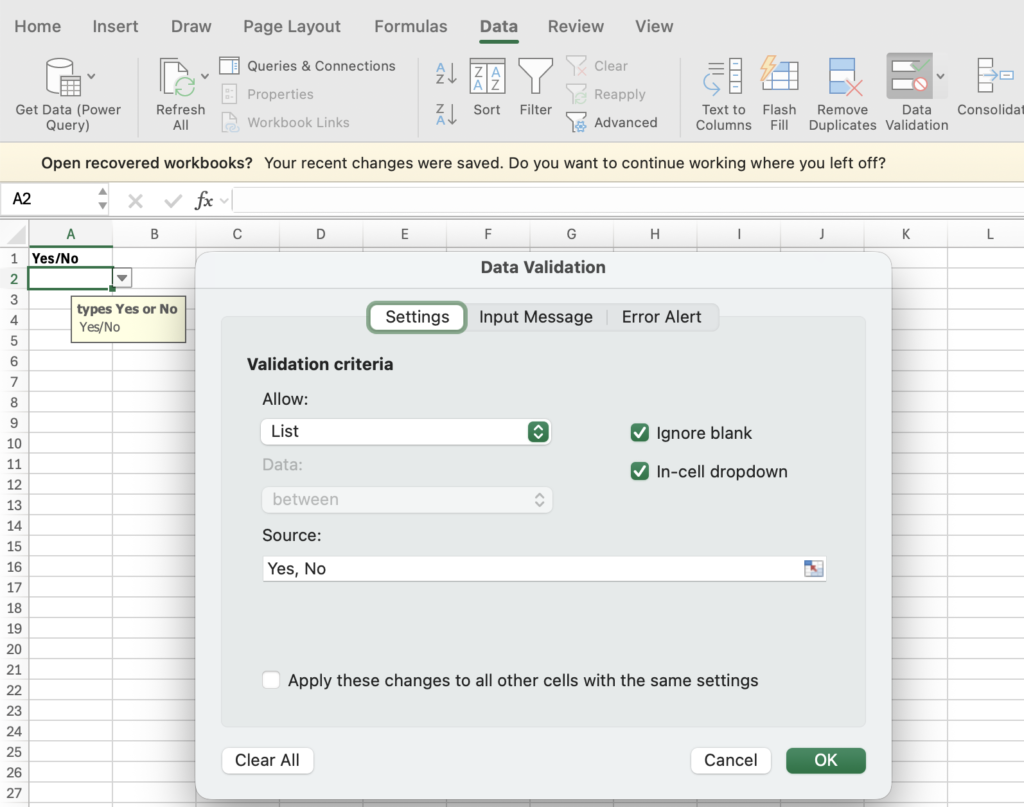
Data validation also allows you to create drop-down lists, making data entry faster and more consistent.
Steps to Add a Drop-Down List
- Select the target cell
- Open Data Validation
- In the Allow box, choose List
- In the Source field, type values separated by commas
Yes,Noor select a cell range - Ensure In-cell dropdown is checked
- Click OK
Users can now select values from a drop-down instead of typing.
6. Removing a Data Validation
to remove data validation from a cell, select the cell, on the Data tab, in the Data Tools group, click Data Validation, and then click Clear All.